Wooden posts or stakes or stone slabs are driven or dug into the ground and markings are made on them. The markings might be in the form of discs painted onto flat sides, routed or sandblasted circles, arrows or symbols infilled with paint, or rings routed/sandblasted around the posts and filled in with paint. Several symbols can be used for stages where a number of trails follow the same route for a time. These posts can be round (peeled) or square sawn.
Markings that encircle the tree-stem or post are the most visible, being seen from every direction. Other types must be carefully orientated so as to avoid being missed by less attentive people. Markers set lower down must be kept free of vegetation, while
 |
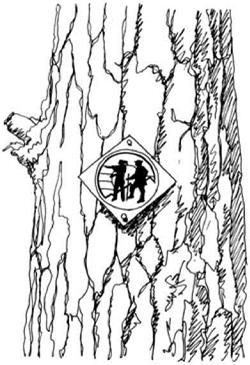
A plastic sign with a special logo has been loosely nailed to a tree. As the tree is slow growing it should be some time before the expanding girth forces the sign off. The damage to the tree may not be acceptable in some places. Alexander Mackenzie Heritage Trail, British Columbia, Canada.
![]()
 |
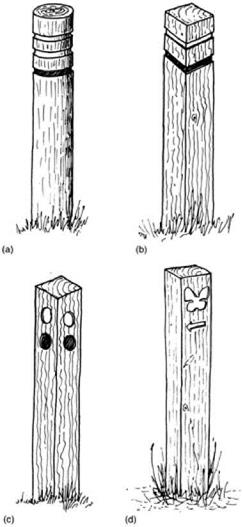
Four examples of routed posts: (a) A
round stake with rings routed in it, each painted with the colour code for a trail. (b) The same method used on a square post. (c) circles routedonthe surface ofapost maybe more obvious butmay not alwaysbe visible from every direction. (d) A symbol and arrow can be used for
themed trails that are best appreciated by following them in one direction.
ones on tree-trunks must not be so high as to be missed, especially if walkers are watching where they are going on rough tracks. In such conditions, rocks painted with markers on the surface of the route can be helpful. Marks set around 1.2m (4ft) above ground are ideal except for trails used in winter (see below).
 |
At junctions where paths diverge, markers must be carefully placed. One at the junction and another a short way along each path, which can be seen readily from the junction, will help to ensure that they are not
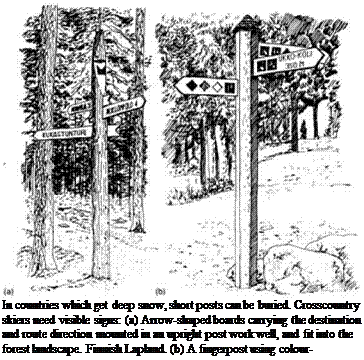
coded diamonds, which is prominent in the view, marks the start of a trail system. Koli National Park, Finland.
missed. Another reassurance marker a little further on is advisable, particularly at a large junction. Fingerposts showing directions more strongly and giving distances might be used in larger trail systems. These should be 2.5-3m (8ft 6in-10ft) tall.
Short posts have disadvantages where snow lies thickly. Taller posts should then be used. Fingerposts need to be tall enough that they do not obstruct skiers on deep snow where this occurs. The height should be calculated to account for the snowpack found in an average winter. Taller posts can be unsightly. They work best in forested areas, where they do not stand out as much as in more open landscapes.


