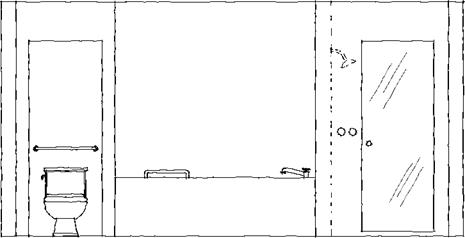
Start your dimensioned design drawing with the priority areas of the plan. These are the elements that are not moveable, demand the most space, or are most important to the client. For example, you might start your dimensioned drawing with the toilet area because plumbing connections dictate the location. Or you might start with a shower, because that is going to be the focal element.
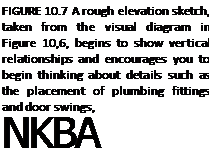 |
 |
Let’s say you are going to start with the toilet area. Place the toilet, draw the centerline, and dimension the needed clearances on either side of the toilet. Planning Guideline 20 recommends 18 inches (457 mm) of clearance on either side of the toilet, so place the toilet (in its existing location) so that there is 18 inches (457 mm) of clearance from the centerline to the wall (see Figure 10.8). An additional 18 inches (457 mm) of clearance is needed on the other side of the toilet.
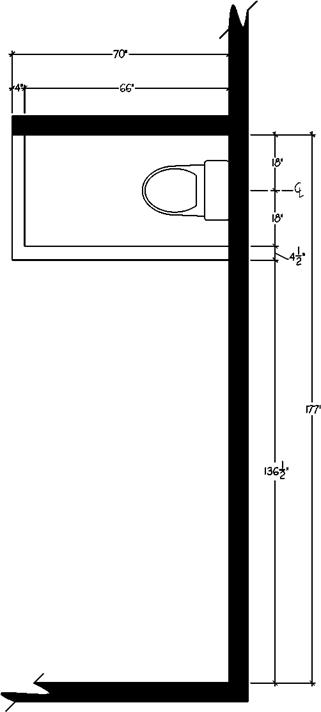
In our example, the toilet and clearances take 36 inches (18 inches + 18 inches) (914 mm = 457 mm + 457 mm). Because the toilet will be in a compartment, an additional 4 1/2 inches (115 mm) of wall thickness must be included in our calculations (only one wall thickness is needed as the toilet compartment is against the room wall). Therefore, the toilet compartment uses 40 1/2 inches (1029 mm). The total dimension of the wall where the toilet is placed is 177 inches (4496 mm). So we can determine how much space is remaining for the placement of the jetted tub and custom shower, as is shown here and illustrated in Figure 10.8.
total wall length
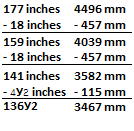 clearance from centerline of toilet to wall
needed clearance from centerline of toilet, on opposite side
wall thickness for toilet compartment
available wall length for placement of jetted tub and custom
shower
If there is a second priority area in your plan, follow the same procedure for placing the fixture, cabinetry, or other elements. Determine the needed clearances, and subtract from the overall wall dimension. For example, Figure 10.9 shows the placement of the custom shower in the bathroom, after the toilet has been located. In our example, we have allowed 6 1/2 inches (165 mm) for the wall between the shower and the bathtub, so that there is room for plumbing in the wall (wet wall) as well as the installation of ceramic tile—while maintaining a minimum clear dimension of 48 inches (1219 mm) in the shower interior.
After placing the custom shower, verify the remaining wall length, as follows:
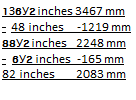 wall length remaining shower interior dimension
wall thickness for shower
available wall length for placement of jetted tub


