Date:
2006
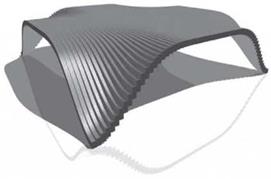
Digital technology and CNC fabrication techniques have become a reliable source for producing complex forms with little concern for the material being used or the waste that is generated in the fabrication process. The information from a parametric process flows in one direction, downstream, from digital to physical (Figure 4.107). Often, the joints and connections are secondary to the form and lead to ancillary steps during fabrication. The result is a physical form that is a vague representation of the digital design, whose details and materiality are inconsistent with the original intent.
The Araneae concept is derived from an investigation of the design process itself, both digital and physical. The intent is to design a process by which an object could be made without knowing exactly what form it would take, or what material would be used. To achieve this, the process must consider the flow of information downstream, from digital to physical, and upstream, from physical to digital. For example, it considers how the physical constraints of a material affect the digital model, just as the digital model will affect the physical material (Figure 4.108).
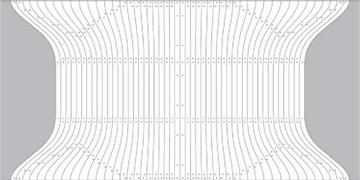
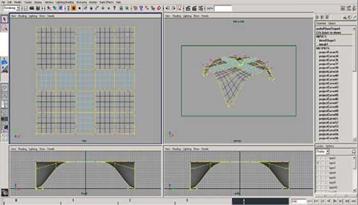
The digital process begins as a plain NURBS surface whose size constraint is based on the size of the output material (i. e., 48-inch plywood). The surface is sliced at intervals equal to the thickness of the output material (e. g., %-inch plywood [Figures 4.109 and 4.110]). This slice is the critical step in converting the digital surface to something that can affect the physical material. The interval slices become the seeds for two-dimensional profiles that nest into a pattern. Nesting the profiles on the material allows the constraints of the material to inform the depth of each part. The pattern becomes the tool paths for the CNC fabrication process.
The CNC process has as much input on the digital constraints as the material. The tool paths must consider the varying kerf produced by each of the three major CNC
|
|
|
|
|
|
|
|
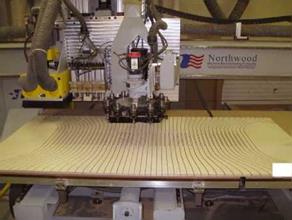
techniques: milling, laser cutting, and water jet cutting. The two cutting techniques produce minimal kerf, but are best utilized for higher-density materials such as metal, stone, or plastics. The milling technique results in a cleaner edge finish to the softer materials, but at the expense of a larger kerf.
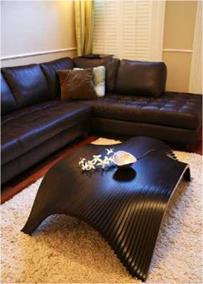
Once the process is in place, the surface is manipulated in the software to represent a table, bench, chair, and so on. In the case of the Araneae coffee table, the height of the table informs the vertical deformation of the surface. As the surface is manipulated, the layout can be reviewed for fabrication constraints (i. e., converging tool paths). Once cleared, the paths are sent to the CNC machine to produce the parts from the material.
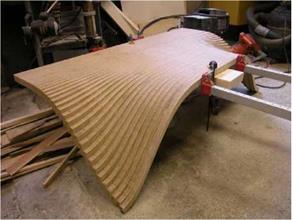
The parts that result are easily aligned, glued, and clamped (Figure 4.111). The end product is a fluid representation of the original digital surface, and expresses the material and CNC process by highlighting the layered parts that produce the finished piece (Figure 4.112).
|
|
|
|

This system represents modular design using twenty-first-century technology. It was designed specifically as a cohesive display system to host a variety of architectural artifacts ranging from small pieces of art and small objects to flat media such as drawings, sketches
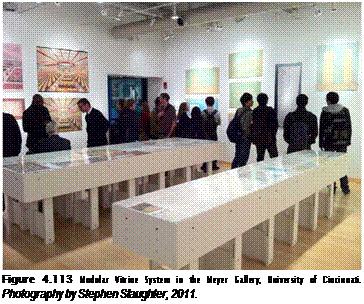 and paintings (Figure 4.113). The end result was a one-man art show entitled "Victory City," honoring the lifelong work and studies of Orville simpson, a self-taught artist and modern visionary.
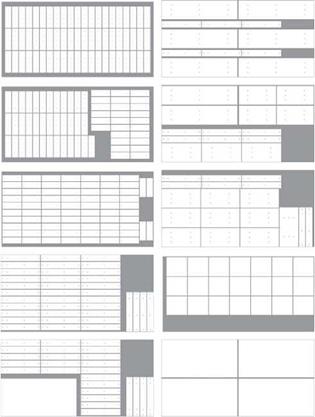
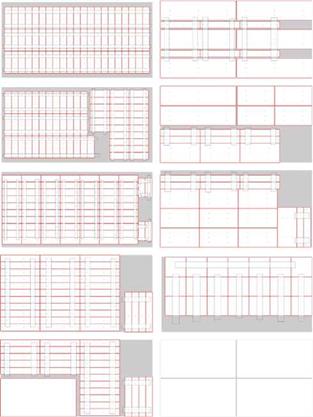
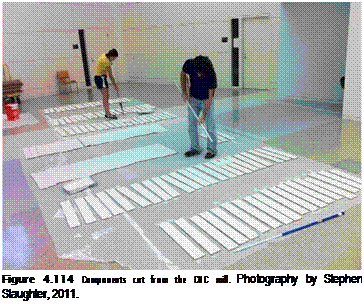 The system had to be versatile enough to allow for an array of configurations and do so in a way that was both easy to understand and fabricate. To satisfy these challenges the system was devised around 24-inch (60.96-cm) x 48-inch (121.92-cm) interlocking modules that acted as the display’s bed or platform on which adjustable sidewalls and adjustable legs were attached, allowing modification of the depth of the case to range from 2 inches (50.8 mm) to 8 inches (203.2 mm), accommodating the variety of media on display. Given that 25 display platforms had to be fabricated, along with an exponential number of pieces required to make one unit, it was decided that the system would be fabricated via CNC mill to ensure that each piece across the spectrum of repeated iterations of parts be produced to dimensional tolerances not possible by traditional hand-crafted fabrication techniques (Figure 4.114). What the system yielded was an easily produced, easily assembled modular display platform that allowed for a variety of parallel, perpendicular, and end-to-end interlocking configurations that can be adjusted to accommodate a variety of small objects and flat media at varying heights, creating flexibility for the curator.
Fastened atop a 24-inch (60.96-cm) x 48-inch (121.92-cm) milled sheet of V2-inch (12.7-mm) medium-density fiberboard (MDF), the structural section of the platform, which receives every 6 inches (152.4 mm), either coffin locks to attach
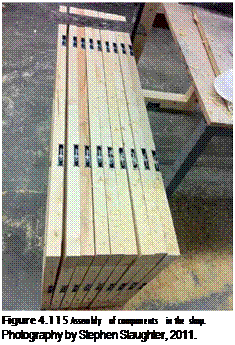 one platform to another, or 1/2-inch (12.7-mm) threaded inserts to attach the sidewalls via /-inch (12.7-mm) socket head cap screws, is made out of planed and routed 2-inch (50.8-mm) x 4-inch (101.6-mm) dimensional lumber (Figure 4.115). The /-inch (12.7-mm) MDF sidewalls were milled with two or three columns of three, 3/8-inch (9.525mm) holes to accept as many 3/8-inch (9.525-mm) bronze sleeve bearings used to protect the pliant MDF from repeated fastening via socket head cap screws through to the threaded inserts in the platform (Figures 4.116 and 4.117). A combination of /-inch (12.7-mm) MDF and %-inch (19.05-mm) finish plywood was used for the adjustable legs, and similar to the system of /-inch (12.7-mm) socket head cap screws sleeving through 3/8-inch (9.525-mm) bronze sleeve bearings to fasten into /-inch (12.7-mm) threaded inserts used to connect and adjust the sidewalls, the legs utilize this technique for their adjustable connection as well.
|
|

